Continue reading
News en vrac / WP sandbox
I just discovered this macro available in C: offsetof. Here is an simple example:
struct { char a; int b; char c; } example; struct example s1; unsigned int offset; offset = (unsigned int)(&(((example *)(0))->b)); |
Thanks to offsetof (in the header stddef.h), the last line can be rewritten in:
unsigned int offset; offset = offsetof(example, b); |
La compilation de la librairie FreeImage 3.14.1 sous Ubuntu 10.10 gènère cette erreur:
In file included from Source/OpenEXR/IlmImf/ImfChromaticities.h:47,
from Source/OpenEXR/./IlmImf/ImfChromaticities.cpp:43:
Source/OpenEXR/Imath/ImathMatrix.h: In constructor ‘Imath::Matrix44::Matrix44() [with T = float]’:
Source/OpenEXR/./IlmImf/ImfChromaticities.cpp:110: instantiated from here
Source/OpenEXR/Imath/ImathMatrix.h:1813: error: ‘memset’ was not declared in this scope
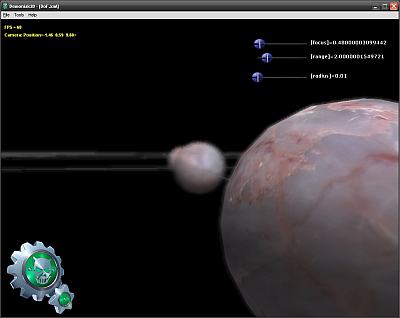
Ces derniers jours j’ai fait quelques tests de Depth Of Field (DoF ou Profondeur de Champ) avec le nouveau Demoniak3D mais je ne suis pas satisfait du resultat car j’ai encore quelques petits soucis pour controler le focus (la zone du champ de vision qui est nette). Le Depth of field est fait dans une étape de post processing et utilise comme seules entrées la texture de couleur de la scene (scene map) et celle de la profondeur (depth map). Cet algo n’utilise pas les MRT (multiple render targets). Voilà un petit aperçu:
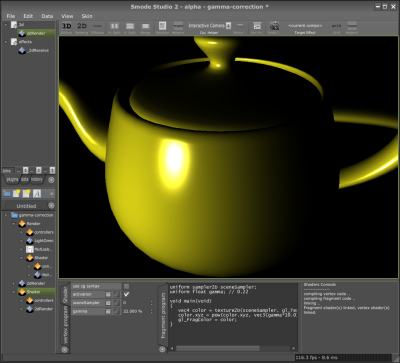
I’ve coded today a small gamma correction filter in Smode. I’ll talk about gamma correction a little bit more very soon with a Demoniak3D demo. Here is the result on a simple scene: a teapot lit with a Phong shader.
The following image shows the rendering of the scene done in the usual manner, I mean without gamma correction:

and now the same scene gamma-corrected (factor 2.2):
Under Visual Studio 2005 (VC8), you can enable the multithreaded build of projects. This great feature makes it possible to use several CPUs to build your projects. This is a per-project setting and it’s done in command line: /MPx where x is the number of cores you want to use. Example: /MP2 to use 2 CPUs if you have (like me) a core2duo.
I’ve done some tests with Demoniak3D:
– Demoniak3D (default): Build Time 0:33
– Demoniak3D (/MP2): Build Time 0:15
Great boost in productivity of large projects!
During the conversion of shaders written in Cg/HLSL, we often find the saturate() function. This function is not valid in GLSL even though on NVIDIA, the GLSL compiler accepts it (do not forget that NVIDIA’s GLSL compiler is based on Cg compiler). But ATI’s GLSL compiler will reject saturate() with a nice error. This function allows to limit the value of a variable to the range [0.0 – 1.0]. In GLSL, there is a simple manner to do the same thing: clamp().
Cg code:
float3 result = saturate(texCol0.rgb - Density*(texCol1.rgb));
GLSL equivalent:
vec3 result = clamp(texCol0.rgb - Density*(texCol1.rgb), 0.0, 1.0);
BTW, don’t forget all float4, float3 and float2 which correct syntax in GLSL is vec4, vec3 and vec2.
Lors de la conversion de shaders écrits en Cg/HLSL, on trouve souvent la fonction saturate(). Cette fonction n’est pas valide en GLSL bien que sur les NVIDIA le compilateur l’accepte (n’oublions pas que le compilateur GLSL de NVIDIA repose sur le compilateur Cg). Mais le compilateur GLSL d’ATI générera une belle erreur à la vue de saturate(). Cette fonction sert à limité la valeur d’une variable entre 0.0 et 1.0. En GLSL il y un moyen tout simple de faire la même chose: clamp().
Code Cg:
float3 result = saturate(texCol0.rgb - Density*(texCol1.rgb));
Equivalent GLSL:
vec3 result = clamp(texCol0.rgb - Density*(texCol1.rgb), 0.0, 1.0);
Au passage lors des conversions, n’oubliez pas les float4, float3 et float2 qui s’écrivent en GLSL en vec4, vec3 et vec2.
Dès que la prochaine release de Demoniak3D, la 1.24.0 (le numéro de version sera peut être le 1.30.0 vu le nombre de modifs), je releaserai la démo du velour avec son beau shader GLSL. Et si je tarde un peu, n’hésitez pas à me poster un petit message pour me rappeler à l’ordre.
[/French]
[English]
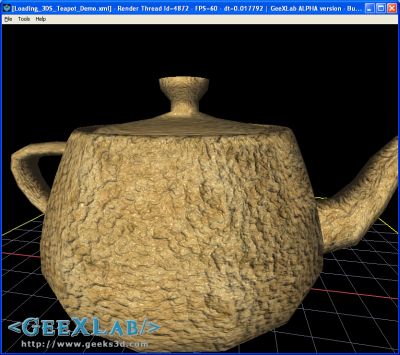
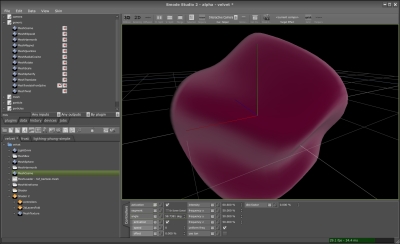
Are you ready for a small velvet GLSL shader? Here’s one, at least a preview of the one I’ve just coded for a demo with Smode. Smode… a software dedicated to create… demos! And the cool thing, is that Smode demos will be also available for Demoniak3D. Don’t look for Smode, it’s not available for you, public… Only few people on this planet are enough lucky to play with. But if you really want to touch it, just drop me an email…
As soon as the next release of Demoniak3D, the 1.24.0 (or better the 1.30.0 because of the huge amount of changes), will be ok, I’ll put online the velvet demo with its nice GLSL shader. And if I’m late, don’t hesitate to post a small message to wake me up!
[/English]
Packing a [0-1] float value into a 4D vector where each component will be a 8-bits integer:
vec4 packFloatToVec4i(const float value)
{
  const vec4 bitSh = vec4(256.0*256.0*256.0, 256.0*256.0, 256.0, 1.0);
  const vec4 bitMsk = vec4(0.0, 1.0/256.0, 1.0/256.0, 1.0/256.0);
  vec4 res = fract(value * bitSh);
  res -= res.xxyz * bitMsk;
  return res;
}
Unpacking a [0-1] float value from a 4D vector where each component was a 8-bits integer:
float unpackFloatFromVec4i(const vec4 value)
{
  const vec4 bitSh = vec4(1.0/(256.0*256.0*256.0), 1.0/(256.0*256.0), 1.0/256.0, 1.0);
  return(dot(value, bitSh));
}
Source of these codes: Gamedev forums
I found this cool random generator on rgba’s website. rgba is a wellknown demoscene group specialized in 4k prods. This random generator is used in their prods:
static unsigned int mirand = 1;
float sfrand( void )
{
    unsigned int a;
    mirand *= 16807;
    a = (mirand&0x007fffff) | 0x40000000;
    return( *((float*)&a) - 3.0f );
}
It produces values in the range [-1.0; 1.0].
You can find the making of this random gen HERE.
Here is a small piece of code that can be useful if you need to quickly generate traces (or log) in your apps:
class cLog
{
public:
  cLog(char *logfile){};
  static void trace(const char *s)
  { if(s) log <<  s << std::endl; };
  static std::ofstream log;
};
std::ofstream cLog::log("c:\\app_log.txt");
Just use it as follows:
cLog::trace("this is a log");
cLog::trace("this is a second trace");
La programmation multithreading est un monde à part et il faut bien en être conscient. Dans une des demos sur laquelle je bosse en ce moment, il y a deux threads: le thread principal qui s’occupe de la gestion des messages de la fenêtre via la classique pompe à message GetMessage() et le thread de rendu pour le rendu 3D de la scène. Dans le thread de rendu, l’application a besoin de récupérer l’état des touches du clavier (pour controler la caméra) avec GetKeyboardState(). Mais la chose à savoir est que l’état du clavier et ses messages sont postés dans le thread principal qui gère la fenêtre et du coup le thread de rendu ne reçoit aucun message et donc ne peut pas lire le clavier avec et KeyboardState(). Une solution pour résoudre ce problème est de partager l’état du clavier entre les deux threads à l’aide de la fonction win32 AttachThreadInput():
// === Main.cpp ===
// Main Thread
DWORD main_thread_id = GetCurrentThreadId();


// === Render.cpp ===
// Render Thread
DWORD render_thread_id = GetCurrentThreadId();

AttachThreadInput( render_thread_id, main_thread_id, TRUE );
Maintenant le thread de rendu peut lire l’état du clavier.
Voici un petit résumé de l’article suivant: GPGPU: far more important than you think. Think 10x a CPU’s performance.